Within the vast lexicon of South Asian food, biryani stands out as a favorite no matter what part of the region you’re from. It’s rich, decadent and the ultimate celebratory dish.
A common misconception is that biryani is an Indian dish. But according to historians, it actually originated in Persia. The word biryani derives from the Persian word birian which means “fried before cooking,” and birinj, the Persian word for rice. And while there are countless theories about how this layered meat and rice dish made its way to South Asia, the consensus among historians is that its prominence increased with the spread of the Mughal empire. As emperors and generals moved across the region, different variations of biryani came to be, often influenced by the spices and ingredients available wherever they settled.
Such regional variations like Hyderabadi biryani, Kolkata biryani, Lucknowi biryani and Dhakaiya biryani have stood the test of time and are widely popular across South Asia.
How to Make Biryani
Making biryani at home might feel like quite the undertaking, but rest assured that this recipe breaks down every step in an easy-to-follow manner. The recipe for the spice blend can be made in advance and stored in an airtight container in a dry place for up to two months.
You’ll also find a recipe for a quick salad to accompany this biryani. It comes together in just minutes and serves as an excellent palate cleanser.
Chicken Biryani with Cucumber and Onion Salad
Ingredients
For the biryani spice blend:
- 1 cinnamon stick (2 inches)
- 1/2 teaspoon cumin seeds
- 1-1/2 teaspoon coriander seeds
- 5 cloves
- 3 blades mace
- 1 teaspoon black peppercorn
- 3 green cardamom pods
- 2 black cardamom pods
For the chicken and marinade:
- 2 pounds skin-on, bone-in chicken thighs and legs
- 1 cup whole milk yogurt
- 2-inch piece fresh ginger
- 10 garlic cloves
- 20 cashews soaked in warm water
- 1 teaspoon nutmeg
- tablespoon salt
- 1 tablespoon ghee
- 2 bay leaves
For the rice:
- 2 cups basmati rice
- 1 teaspoon ghee
- 1 teaspoon salt
- 1 green cardamom pod (optional)
- 1 bay leaf (optional)
- 3 cloves (optional)
To assemble the biryani:
- 1 large yellow onion, thinly sliced
- 1 large russet potato, cubed
- 5 tablespoons ghee, divided
- A pinch of turmeric
- 1 teaspoon garam masala
- 1 teaspoon salt
- 2 tablespoons chili powder
- 1 cup whole milk
- A pinch of saffron
- A handful of dried fruit, like plums, raisins or golden sour prunes, chopped
- 1/2 teaspoon kewra water (optional)
For a quick cucumber and onion salad:
- 1 English cucumber, sliced
- 1 small red onion, sliced
- A squeeze of lemon juice
- Salt, to taste
- Pepper, to taste
- A drizzle of olive oil
Directions
Step 1: Make the spice blend

In a nonstick pan over medium heat, toast all the biryani spices until fragrant, about three to five minutes. Take the pan off the heat and let the spices cool for 30 seconds. Transfer the spices to a spice grinder, grind to a fine powder and set aside.
Alternatively, you can also use a mortar and pestle to grind the spices, though you would need to be extra vigilant to ensure no tiny bits and pieces of whole spices remain.
Step 2: Marinate the chicken

Next, to create the yogurt marinade, add yogurt, ginger, garlic, soaked cashews, nutmeg, ghee and salt to a blender and blend at high speed until smooth.
To prepare the chicken, remove the skin by gently pulling it away from the meat with your fingers and slicing it off with a knife if necessary. No need to remove the remaining bits and pieces of skin and fat, because those will melt away during the cooking process.
In a large bowl, combine the chicken, the yogurt marinade, the biryani spice blend and two bay leaves, and mix until well combined. You can use a pair of tongs for this step, though the best (and traditional) way to do this is by hand, which ensures that the marinade is thoroughly incorporated into the chicken. Cover tightly and marinate in the fridge for at least an hour or overnight.
Step 3: Wash the rice and prepare the onions and the potatoes
30 minutes into the marinating time, begin preparing the other layering elements of the biryani. First, wash the rice thoroughly under cold water, gently agitating with your fingers until the water runs clear and set aside.
Next, prep the onions and potatoes that will help build the different layers of flavor. Finely slice one large yellow onion into thin slices. It’s very important to make sure the slices are as thin and as even as possible, or they will cook unevenly causing the thinner slices to burn and lend a bitter taste to the final dish. Then, peel and cube one large russet potato into relatively even pieces.

Heat a large Dutch oven or an oven-safe, heavy-bottomed pot with a lid over medium-high heat. You will be building the entire dish in this pot, so be sure to pick one that is large enough to hold everything! Add a tablespoon of ghee and the potatoes, along with a pinch of turmeric, and fry until golden brown on all sides, about five to eight minutes. The potatoes don’t need to be cooked through, this step simply allows the potatoes to take on the flavor of the ghee and turmeric. Once the potatoes are browned, use a slotted spoon to transfer the potatoes to a plate lined with paper towels and set aside.
Next, add three tablespoons of ghee to the same pot or Dutch oven, keeping the heat at medium-high. Add half the sliced onions and fry stirring constantly to ensure even cooking. Once the onions turn golden brown and just crisp, transfer to another paper towel-lined plate with a slotted spoon and set aside.

Be sure to keep a close eye on the onions as they can burn or darken quickly!
Step 4: Cook the chicken

Add the remaining onions to your Dutch oven. Saute the onions on low to medium-low heat until softened. Add a teaspoon of garam masala, a teaspoon of salt and two tablespoons of chili powder, and cook until the onions are caramelized. (Feel free to reduce the amount of chili powder If you don’t want your biryani to be too spicy.)
Pull the chicken out of the fridge and discard the bay leaves. Add the chicken, along with the yogurt marinade, to the caramelized onions and cook on medium heat for five minutes, stirring often and scraping the bottom to prevent the sauce from sticking. Add the potatoes. You can add a few tablespoons of water if the sauce begins to thicken too much.
Cook the chicken and potatoes for 15 minutes on medium heat, occasionally stirring and scraping.
Step 5: Par-cook the rice
While the chicken is cooking, in a separate pot, combine the washed basmati rice, two cups of warm water, a teaspoon of salt and a teaspoon of ghee.
Cook the rice over medium-low heat until the water has evaporated and the rice grains are about 75% cooked. The grains should have a slight bite and when pressed between two fingers, the outer layer of the grain should disintegrate leaving behind a tiny white grain in the center. Fluff the rice with a fork and set aside.

Editor’s tip: You can add a couple of cloves, a cardamom pod and a bay leaf while cooking the rice for additional flavor, but that’s totally optional. If you do, just be sure to fish out the whole spices and discard them before the next step.
Step 6: Layer and bake your biryani
First, place your oven rack in the middle and preheat to 350°F.
This step is where the layering finally begins. Once the chicken has browned all around and the sauce has turned slightly darker, turn off the heat. Gently warm a cup of milk with a pinch of saffron.

To begin the layering process, layer half the rice on top of the chicken along with half of the reserved fried onions and dried fruits. Layer the remaining rice and, with the back of a wooden spoon or spatula, poke several holes on the surface of rice. Pour warm saffron milk throughout, sprinkle a teaspoon of kewra water (if using) and top with the remaining fried onions. Drizzle with about a teaspoon of ghee, cover with the lid and bake in the oven for 30 to 35 minutes until the chicken is tender and falling off the bone.
Editor’s tip: If you’re using a regular heavy-bottomed pot with a lid that might not be as heavy or secure as a Dutch oven, tightly cover the pot with aluminum foil before placing the lid on top. The foil will ensure that the steam (which holds the flavors and aromas crucial for a great biryani) will not escape during the cooking process.
Step 7: Make a quick salad

This cucumber and red onion salad is a classic accompaniment for biryani because it’s a great palate cleanser. You can put this together quickly while the biryani finishes in the oven. Just slice the cucumber and red onion and toss with some salt, pepper, lemon juice and a drizzle of extra virgin olive oil. You can also add any fresh herbs of your choice.
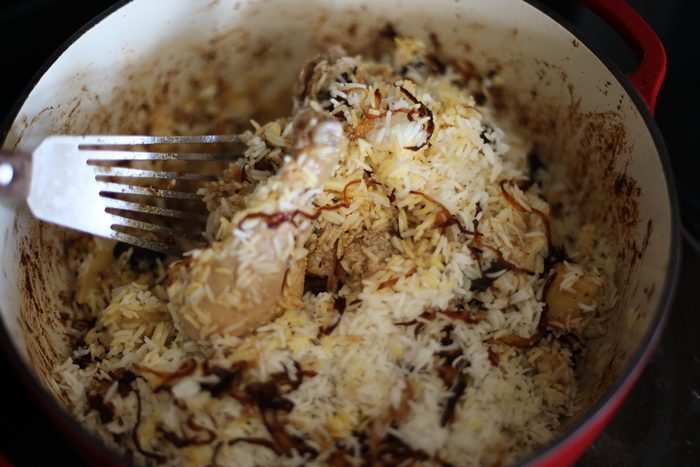
Step 8: Finish and serve

Take the biryani out of the oven and let it rest with the lid on for two to three minutes, so the steam settles and the flavors continue to integrate. Take off the lid and, with a metal spatula, carefully mix the rice and the chicken, scraping the bottom of the pot and pulling some of the chicken pieces to the surface. Be careful not to overmix during this step. Overmixing could break the rice grains and ruin the texture of the entire dish.
Finally, serve your biryani family-style with the cucumber and red onion salad.
Biryani Cooking Tips
- For any biryani recipe, it’s always best to use bone-in protein because the bones help keep the meat moist and tender. For this recipe, you can use chicken thighs, drumsticks or a mix of both.
- Biryani is an exquisite dish that should be made with the best, freshest ingredients. The most important ingredient in this dish is rice, so be sure to use really good quality basmati rice.